Monday, April 30, 2018

Hope Your Day GLOWS

Hello Crafty Doodle Chick Friends!!

Kendra here from Luv 2 Scrap N' Make Cards to share a cute card with you!!

I recently got the fun Little Fireflies and coordinating Little Fireflies Lawn Cuts die set!!

I just love when the fireflies are out at night!  It is so much fun to stand in our yard, I feel like I truly am in a magical place!  It's so beautiful!!

Here is the card I created:
I used my Distress Inks to create my background and then added some glimmer mist!  I then stamped my sentiment with black ink.

I was so SUPER excited to get the Glow in the Dark Embossing Powder!!  This stuff is so cool!!  So glad I finally got the chance to use it!!  I stamped the 'Glows' sentiment again with VersaMark ink, so I could emboss with the fun embossing powder!!

I then stamped some of the other accents in the set with VersaMark ink randomly and embossed with the Glow in the Dark Embossing Powder!!

Check it out in the dark:
HOW COOL!!

This embossing powder is so cool!!  I love it!!
I honestly would love to emboss everything with this embossing powder!!  It's so neat!  LOL! 

Be sure to check out all the lovely products the Crafty Doodle Chick shop carries!!

And be sure to check back for more inspiring projects by the DT!! 

Have a lovely day!


----------

Products Used:
Little Fireflies Lawn Fawn          Little Fireflies Lawn Cuts

Glow In the Dark Embossing Powder Lawn Fawn

Saturday, April 28, 2018

Sweet Moments

Hey, everyone! It's Kevin here sharing a super sweet card featuring the Sweet Moments stamp from Dreamerland Crafts. Check it out-


First, I started on my background. A couple Distress Inks worked perfectly to portray a sky and grass backdrop. Then I die cut the Linked Oval Chain Frame to frame up the scene. Finally, I stamped, Copic colored, and cut out the bike image. I popped up the cute image with foam dots and added an "I Love You" sentiment.

Thanks for stopping by today! Have a great rest of your weekend!

Friday, April 27, 2018

Cross Stitched or Not I LOVE This Die!

Hello, hello!  It's Friday, woot woot! And we are finally feeling some Spring here in Ohio, yay!!!  With all of my gardening lately I was inspired to create a floral card to share with all of you.  While I was creating my card I remembered that I had recently ordered the new Altenew Cross Stitch Canvas die, and guys... I'm in LOVE!  This thing is so fun!!!  I love the look of stitching on cards, but I don't have a sewing machine so it has never really been an option for me.  With the cross stitching craze going on, this die is a must have. Now, with that said... I added no sewing to my card lol!  But I still love the effect and it gives me an easy faux cross stitch look...


Isn't it just so cool?  Now, second thing I must fill you in on... this die is not currently in the store (sorry I bought it!), but wait!  It's coming on Monday, so keep your eyes peeled before it sells out again!  Before I die cut the panel I had stamped all of my floral images from the Beautiful Day Stamp Set by Altenew.


Like I said this fun die set will be back and in the Store soon after this upcoming Monday, so be ready to grab yours!
Happy Crafting!
Lisa

Supplies Used:
   

Wednesday, April 25, 2018

Swinging By

Hi! Kerys here from Scrappinnhappy with my weekly post on the blog!

One of my favorite stamp companies in the Crafty Doodle Chick store is My Favorite Things. I love all of their stamps, dies and stencils, and the recent release is no exception.
I used MFT's Pure Innocence 'Birthday Piñata' stamp set for this card, along with the current MFT color combination challenge for inspiration.

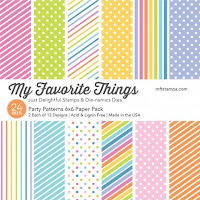
I stamped the Birthday Piñata image onto some plain white cardstock, and also some yellow dotted paper from MFT's Party Patterns paper pack. I colored the image using my prismacolor pencils, and then paper pieced the dress and bandana. I did the same thing for the piñata image - paper piecing the pink dotted paper. The candy was stamped and colored with my prismacolor pencils.
These were all fussy cut out.

I decided to make this into a shaker card. The window was cut from the white cardstock using MFT's Rectangle Peek-a-Boo Window die, I used a matching rectangle shaker pouch, sequins from my stash, and then backed with paper from MFT's Party Patterns paper pack.

The branch for hanging the piñata was cut using MFT's solid birch tree die in lemon chiffon cardstock, adding some pink baker's twine to 'hang' the piñata.  I added a pink dotted border along the bottom, cut using MFT's Stitched Scallop Basic Edges die.

I then stamped the sentiment from the Birthday Piñata stamp set using MFT Extreme black ink.

You'll find these products in the Crafty Doodle Chick store:


 Extreme Black Hybrid Ink Cube

Thanks for looking.
Happy Crafting!

Tuesday, April 24, 2018

Lawn Fawn Hay There

Hello!  Larisa here sharing a fun little farm card using Lawn Fawn's Hay There Stamp set.  You can find it HERE in the Crafty Doodle Chick Shop


To create my card, I chose some farm themed patterned papers, colored my images to match and then cut them out using my Scan N Cut 2.  Then I die cut a farm background using a die I had in my stash and pieced it all together.  Then I popped my little farm animals on top using foam tape.  A fun little sentiment finishes it off.
 
 
here's a look at the inside:

 
Thanks so much for stopping by!  Have a great day!


Monday, April 23, 2018

Favorite Human

Hello Crafty Doodle Chick Friends!!

Kendra here from Luv 2 Scrap N' Make Cards to share a cute card with you!!

We recently got a puppy!!  An Australian Shepherd! He's won over our hearts already! (You can check out my blog here if you want to see a photo of him!)

Recently when looking around the CDC shop, I found the super cute Puppy Kisses stamp set by My Favorite Things and had to add it to my collection!

I decided to first use the stamp set to create my own background paper using all the adorable dogs in the set, as I couldn't decided which dog to use first!!  I also used the heart from the set which I stamped in red ink to stand out!
I decided to add a strip, with the fun 'You Are My Favorite Human' sentiment from the set!

I thought this card would be fun to send one of my kiddos sometime!
So cute!!

Be sure to check out all the lovely products the Crafty Doodle Chick shop carries!!

And be sure to check back for more inspiring projects by the DT!! 

Have a lovely day!


----------

Products Used:
Puppy Kisses - MFT

Sunday, April 22, 2018

Thanks

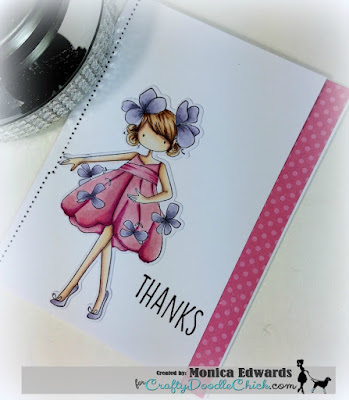
Hi crafters!  Today I am here sharing a thank you card for my friend using a Stamping Bella stamp Tiny Town Garden Girl Bella which is available in the Crafty Doodle Chick store.  I stamped the image on blending paper and colored her with Copic pens and what is nice this set comes with coordinating die.

 Copics used : 
Outfit: RV32, RV34, RV19, V20, V25, V28
Skin: E00, E11, E50
Hair: E30, E31, E33, E37, E29 
Thanks for stopping by!


Be sure to join our FB group: Crafty Doodle Create and Chat: http://bit.ly/2mtXDqz and you still have time to join our Pawfect Challenge #2 here: http://bit.ly/2Jh7z0v

Saturday, April 21, 2018

Hey!

HEY, everyone! I'm not sure about you all but I think spring has finally arrived here in northern Minnesota. So for today's post I thought I would make a brighter and more colorful card than usual! Check it out-


I started with the background, which may look more complicated than it really is. All it took was a piece of regular computer paper and Distress Inks. I started on the far left with only part of the mask on the panel and blended on the first color. Then I moved the mask over and inked on another color. I continued this until the whole panel was full of ink. Some water droplets and spritzes added some texture and broke up the color nicely.

Next, the sentiment. I'm not sure if I've mentioned this here before, but the Hey die from Heffy Doodle cuts SOOOOO well. I cut three of them and layered them together and popped up the Hey with foam spares. Then I heat embossed a sub-sentiment and adhered it over the Hey.

Thanks for stopping by today! Have a great rest of your weekend!

Friday, April 20, 2018

Split that Stencil!

Hello wonderful crafty friends!  It is Lisa here today and I'm going to let you in on a little crafty secret.... it's ok to cut up your craft supplies... like that sentiment that is a little too long for your project, just snip it where you need to with scissors.  Or how about those really large, and beautiful stencils that you can find from many companies?  Well don't actually cut your stencils, but you can stencil it onto something with various mediums and cut those however you want!  And today I'm going bold and doing just that...


This stencil (Leaf Burst by Altenew) had my heart as soon as I saw it, so I couldn't wait to get it in my hands.  Once I had it I knew that it was begging for me to make it shine with some of my Nuvo Glimmer paste, and shine it did.  But then I kept looking at my 6 x 6 square and I realized I really didn't want to create a card this large, nor did I want to cover any of it up.  While I was thinking about what to do with my newly embossed panel I decided to add a few splashes of silver spray mist.  As I turned the panel at different angles I noticed that this design is asymmetrical!  I could just cut it down the middle!  And so I did...


And viola!  I now have a matching his and her Birthday card set! To give the identical panels their appeal I went with dark masculine colors for my guy card, and bright rainbow colors for a more feminine appereance.  And I love them both!  My sentiments were heat embossed from the My Favorite Things Anything but Basic Birthday Wishes.  The patterned papers were from the My Favorite Things Black and White Stripes Paper Pad and the Lawn Fawn Really Rainbow Petite Paper Pack.


Thanks so much for stopping by today!  Don't forget there is still time to join our newest challenge!
Happy Crafting!

Lisa

Supplies Used:


Wednesday, April 18, 2018

Stamping Bella Gnome Pile - Challenge Inspiration

I am super happy that Crafty Doodle Chick decided to stock Stamping Bella stamps - these have been a favorite of mine for a while now.
I just LOVE the new gnome images - they seemed to be a little obsession of mine over the Christmas period last year! Not your typical garden gnomes - but more scandinavian in design.
I chose to use Stamping Bella's 'Gnome Pile' for my card.


I wanted to give you a little inspiration for the current RAINBOW challenge, which will end on Saturday 21 April 8pm EST. I have a sketch for you to try out too if you feel this would be an added inspiration.


 This is a very simple sketch, which can be interpreted any way you like. I love to use sketches for inspiration, otherwise all my cards seem to look the same!!

I colored the gnomes using my prismacolor pencils, adding some extra details here and there with a white gel roll pen. I then fussy cut it out - although you can buy the coordinating dies.

I used grassy edges border dies from My Favorite Things to cut out the border from some green vellum and glitter cardstock - layering them together. As I glued the vellum on top of the glitter cardstock, you could see the glue through the front of the card. I added some green baker's twine to hide this.

I wanted the sentiment to fit to the side of the gnomes as in the sketch, so I cut the sentiment stamp in half and stacked them on top of each other. I then stamped the sentiment onto the white cardstock background using MFT Extreme Black ink.

I ended up getting some ink from my fingers on the top of the card - I am SO not good at keeping cards clean! To cover this up I used a stitched cloud die set from Whimsy Stamps. I cut the clouds out from white cardstock so the would blend into the background - on this occasion I didn't want to add blue distress ink for the sky. I like how subtle the card is without.

You'll find these products in the Crafty Doodle Chick store:

 
 Extreme Black Hybrid Ink Cube

Available from My Favorite Things:


Thanks for looking and don't forget to check out the Crafty Doodle Chick blog every day for lots of inspiration from the rest of the design team!
And don't forget this is the last week of challenge #2 RAINBOWS to add your photos to the Paw-fect Challenge on Facebook, for your chance to win a $10 gift certificate to the store and the title of TOP DOG!!

Happy Crafting.

Tuesday, April 17, 2018

MFT Rain or Shine

Hello!  Larisa here sharing a fun card with the New MFT Rain or Shine stamp set.  This adorable set and others can be found in the Crafty Doodle Chick Shop here


https://craftydoodlechick.com/collections/mft/products/bb-rain-or-shine-stamp-set-mft

For my card, I decided to create a rainy scene.  I chose some "rain" themed patterned papers, colored my images to match, and fussy cut them out.  Then I die cut some green bushes, and a grey sidewalk out of solid cardstock.  I layered those on top of some rain-drop patterned papers and popped my images on top with some foam tape.  Then I stamped my sentiment on a die cut cloud and added it to the sky with a few other clouds.  A strip of die cut grass and a kite die cut finish the card off, creating a fun little rainy scene. 
 
Here's a look at the inside:

 
Thanks so much for stopping by!  Have a great day!!!
 

Monday, April 16, 2018

Sending Smiles

Hello Crafty Doodle Chick Friends!!

Kendra here from Luv 2 Scrap N' Make Cards to share a cute card with you!!

I'm featuring the fun Monster Squad stamp set by Jane's Doodles!!

I just LOVE the sweet monster's in this set!! Sure to put a smile on anyone's face, no matter what their age is!

I created this card for my son:
I occasionally will send them card to my parent's cabin when I know they will be going up there!  They just love getting mail!

I stamped the one eyed monster on Copic paper and colored in with my Copics!  I then fussy cut the around the image to be able to adhere to my card with pop-dots!

The 'sending smiles' sentiment is also from the stamp set!!


I added some glossy accents to his eye!!  I love the added look it gives!!

Be sure to check out all the lovely products the Crafty Doodle Chick shop carries!!

And be sure to check back for more inspiring projects by the DT!! 

Have a lovely day!


----------

Products Used:
MONSTER SQUAD

Saturday, April 14, 2018

Rat Race

Hey everyone! I thought that you guys might want a break from all the critter cards I've been sharing lately. So here it is-


I used the Maze Die from Neat and Tangled along with the coordinating sentiment set. Some bold cardstock was perfect to put some pizzazz into this clean and simple design. First I made the card base out of some dark coral paper. Then I added some gingham paper behind the maze cut out. A heat embossed sentiment finished it off!

Thanks for stopping by! Have a great weekend!

Friday, April 13, 2018

You Are My Happy Place

It's Lisa here today, and by now I'm almost starting to feel like I should call my friday posts: Unicorns with Lisa, bwahahaha!  Guys, I just can't help it!  Those darn Stamping Bella Rosie and Bernie sets make me so happy that when it's time to get crafty they are the first things I grab.  Today I'm using the  Rosie and Bernie in Hawaii stamp set, and I apologize that this particular set is sold out but you can get your name on the waiting list so that you will be notified as soon as it comes in.  In the mean time you can still pick up this cutie while supplies last.  But for today let's get wisked away with some tropical vibes that these two friends provide...


I mean really, could these two be any cooler?  To create my card I stamped the image onto cardstock and colored them in with a mix of Spectrum Noir Illustrator Markers.  I added a little glossy accents to her glasses and his drink for a fun effect and set it off to the side to dry.  I then adhered a few layers of patterned paper, making a beach scene with a beach towel for them to sit on.  Some of the patterned paper I used is from the Lawn Fawn Really Rainbow Petite Paper Pack.  ( A great substitute for this paper is the new Sunny Studios Rainbow Bright Paper Pad)    I added a sentiment from an Altenew Stamp Set.  Once my image was dry I cut it out and adhered it with foam adhesive.  My final step was to add a few colorful sequins to draw the eyes up diagonally through my card.


Cheers to you my friend for stopping by to check out my card today, and I hope you have a fantastic weekend!  By the way don't forget to join us in our current Pawfect Challenge for your chance to win a $10 shopping spree to the store!

Happy Crafting!
Lisa

Supplies Used: